RealityCapture. Support Tips.
Color Cursors
Why & How to use color cursors in RealityCapture? Assigning a color cursor (color bar) or more of them (blue, green, magenta, or coral) to objects and views is helpful for navigation in complex scenes or during placing the control points.
- You can use four colors to pair the selectable objects with the specific views (e.g. images or created textures with 2D views)
- To assign/unassign color to an object, hold 1/2/3/4️ and click on any pickable object in 1Ds/2Ds or an image in 3D view.
- To assign/unassign a color to a view, select the specific view and press CTRL + 1/2/3/4.
For more information, search for "color cursors" in the application help
Image Layers
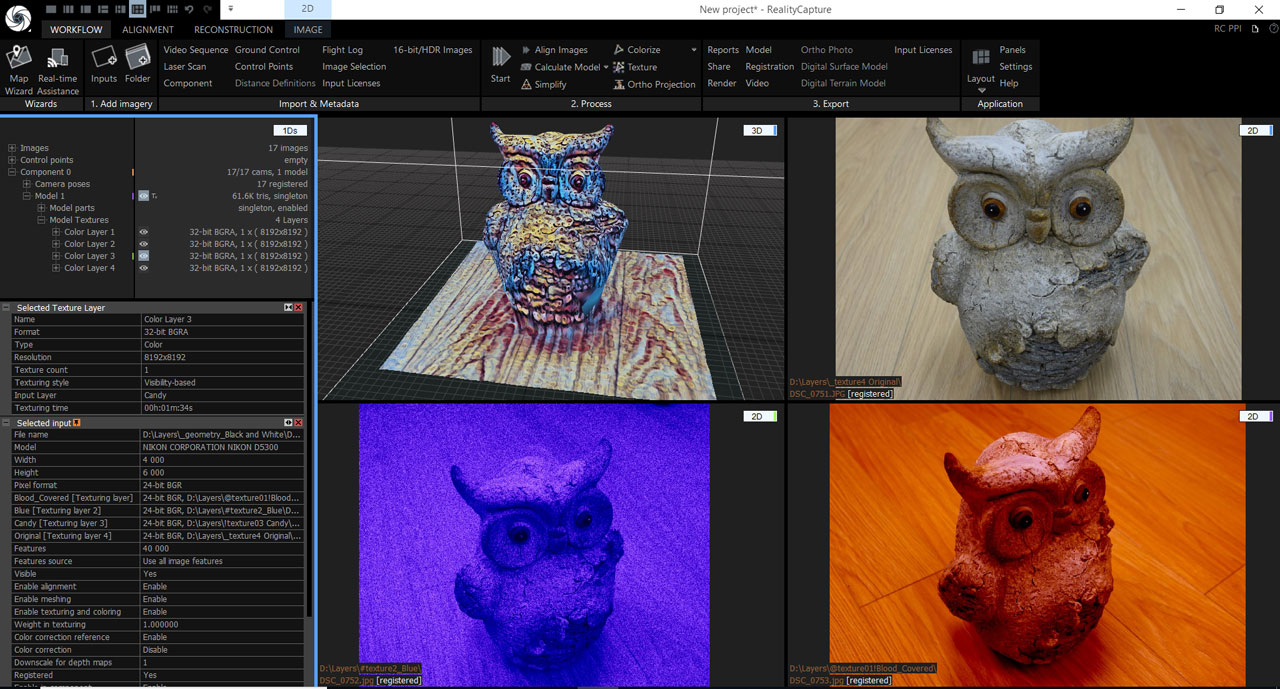
Have you discovered the beauty of image layers yet? In RealityCapture, you can sort your images into different layers, add them custom naming, and then use them in different processing steps. You can, for example, use a different set of images for alignment and meshing (e.g. images with projected pattern) and a different set of images for texturing. This is very beneficial when using PPI, there is no need to license other than the geometry layer. Folder naming convention: Examples: _geometry MyGeometry @texture01!Blood_Covered _texture02_Black and White !texture03 Candy _texture4 Original Image naming convention: Examples: IMG01.png.texture Blood_Covered.png IMG02.png.texture03@Black.and.White.png IMG02.jpg!texture01_Top Light.png Check in-app help – Image layers for more info.
Clipping Box
Clipping box is an adjustable block defining the 3D display of the chosen part of your reconstructed 3D model. The best part is that you do not lose any part of the model. Also, the selection tools respect the clipping box and the hidden areas are not selected. Clipping box can be very handy when:
- You need to display a large model in solid/sweet mode by parts
- You need to do inspections of selected parts of the model or interiors of the buildings
- You need to select details in the model and filter them out
You can find the Clipping box tool in the 3D SCENE context tab. It will be displayed as a blue box in the 3D view.
Texture Layers
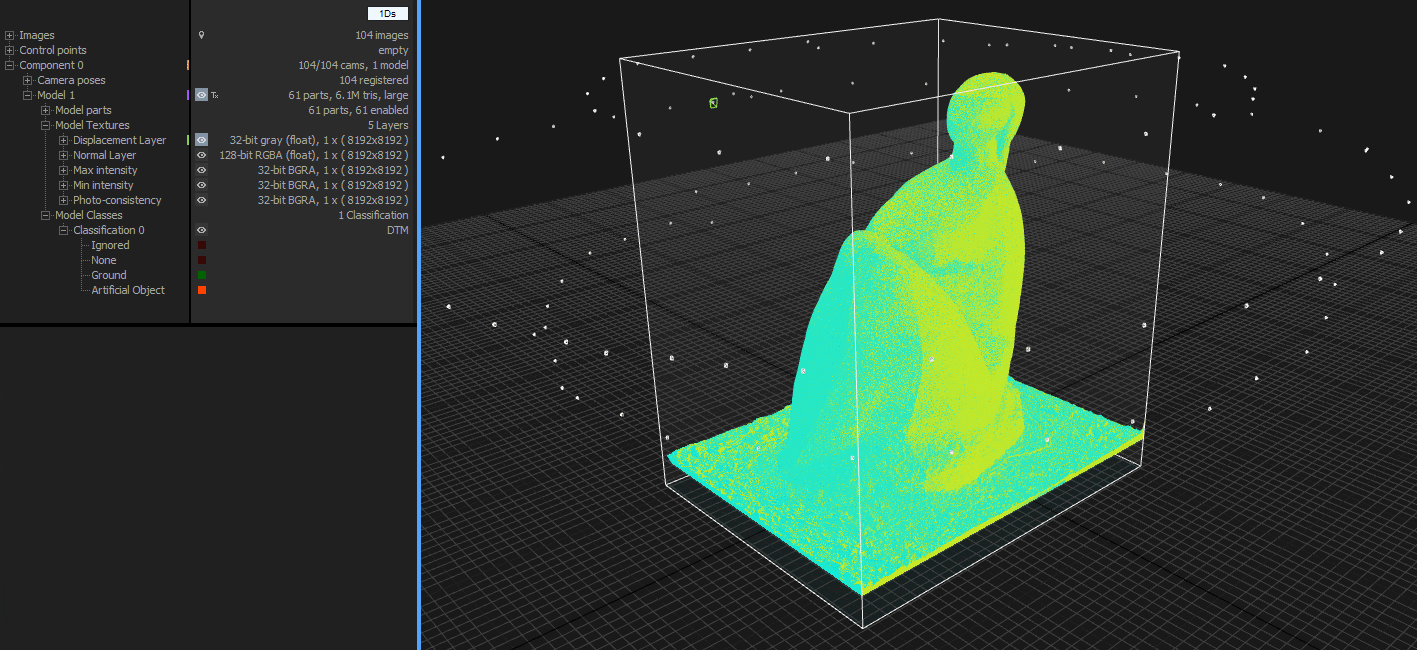
RealityCapture supports creating different layers under model textures, e.g. Color layers by running a texturing process or normal and displacement layers when reprojecting model textures. You can find the list of all created texture layers in the 1Ds view, under the selected model, section Model Textures. By selecting an individual layer (or little eye icon), you can display an individual layer in 3D view (in Sweet mode). If no layer is toggled visible, only a colorized model is displayed. Details of each texture are displayed in the 1Ds, in the Selected Texture layer table. By unfolding each layer, you can find individual textures there. You can display them in the 2D view by using color cursors or simply by drag and dropping them into the 2D views. In addition to model textures, you can find also created model classifications there. Each classification and its classes can be displayed in the 3D view as well, on the top of the selected texture.
CLI Sample Script
CLI scripts help you automate your workflow. Download our CLI sample script for processing the full-body scan and learn how to automatically process a calibration dataset, export XMP files, and re-use them in the processing of all other datasets. Four datasets of full-body scans included.